You don’t need to build a million-dollar app to be awesome with AI. You don’t need to be technical. You don’t even need to know what “vibe coding” means yet.
You just need a problem worth solving and about 10 minutes.
I’ll show you exactly how I did it, and more importantly, how you can take the same approach and build something useful for your specific situation, whether that’s work, school, family, or just impressing people who think AI is only good for writing mediocre emails.
What Actually Happened
My daughter called me the other day. She’s a college freshman studying to be a doctor. Biology, anatomy, physiology. Heavy stuff. Way over my head. She said she’d been using ChatGPT to quiz her on class material, but kept running out of credits before she could get through everything.
“Dad, what do I do?”
I told her to give me 10 minutes and check her messages.
Then I vibe coded her an entire study website. 231 fill-in-the-blank questions and 134 flashcards, all pulled directly from her actual class PDFs. Not generic biology content. Her teacher’s material, organized by chapter, on a live website with her name in the URL.
She called me back out of breath. “Dad, that’s AMAZING. How did you do that? Can you make more?”
Dad of the year. And I barely did anything.
Now, here’s why I’m telling you this story. It’s not because I think you need a flashcard website. It’s because the process I used (feeding source material to an AI and having it build a working tool in minutes) works for basically anything.
A sales rep could feed it a product catalog and get an interactive comparison tool for client calls. A marketing manager could drop in brand guidelines and get a landing page draft. A teacher could upload lesson plans and get a full quiz site for students. A job seeker could hand it a resume and headshots and get a portfolio website. A small business owner could give it a menu or service list and have a customer-facing site by lunch. You get the point.
The pattern is the same every time. The output changes based on what you need.
Let me walk you through exactly what I did so you can follow along and adapt it for whatever you’ve got in mind.
What “Vibe Coding” Actually Means
Before we get into the how-to, let’s kill the jargon. “Vibe coding” just means telling an AI what you want in plain English and letting it write the code for you. You don’t have to read the code. You don’t have to edit the code. You just describe what you want, and the AI builds it.
That’s it. If you can write an email describing what you need, you can vibe code.
What You’ll End Up With
A working website, live on the internet with a real URL, that does whatever you told the AI to build. In my case, it was a study tool. In yours, it might be a client resource, a training site, an internal dashboard, a portfolio, or something I haven’t thought of.
No servers. No databases. No monthly hosting fees. No coding knowledge. Just a functioning tool that you can share with a link.
The Tools (All Free)
You need two things, and none of them cost money:
OpenAI Codex. This is the vibe coding tool from OpenAI (the ChatGPT people). If you have a paid ChatGPT subscription, you can use Codex for free. Even free accounts can access it right now, just with lower usage limits. Google “OpenAI Codex download” and install it. Works on Mac and PC.
Get Codex: https://openai.com/codex/
Cloudflare Pages. This is where your website will live. Cloudflare lets you host the websites we’re making for free.
Create a free Cloudflare account: https://www.cloudflare.com/
Namecheap (optional). Only if you want a custom domain name instead of a default Cloudflare URL. A .com runs about $18/year.
Register a domain: https://www.namecheap.com/
That’s the whole stack. Free AI, free hosting, optional cheap domain.
Step-by-Step: How I Built Mine (and How You’ll Build Yours)
Total cost: $0. Total time: about 10 minutes for your first project. No coding required.
I’m going to walk through exactly what I did for the study website. As you follow along, just mentally swap my details for yours. Your files, your description, your use case.
1. Set Up Your Project Folder

Before you touch Codex, create a simple folder structure on your computer.
Go to Finder (Mac) or Explorer (PC) and make a folder called Projects. This will hold all your vibe coding projects, because once you do this once, you’re probably going to want to do it again. Inside that, create a folder for this specific project. Call it whatever makes sense. I called mine “madison2”.
Now inside your project folder, create a subfolder called private. This is where you’ll put the source material you want the AI to work with.
For me, that was my daughter’s biology lecture PDFs. For you, it might be product spec sheets, your resume and headshots, training documents, a service menu, brand guidelines, or really any documents relevant to what you want built.
Drop your files into the private folder.
2. Connect Codex to Your Project Folder
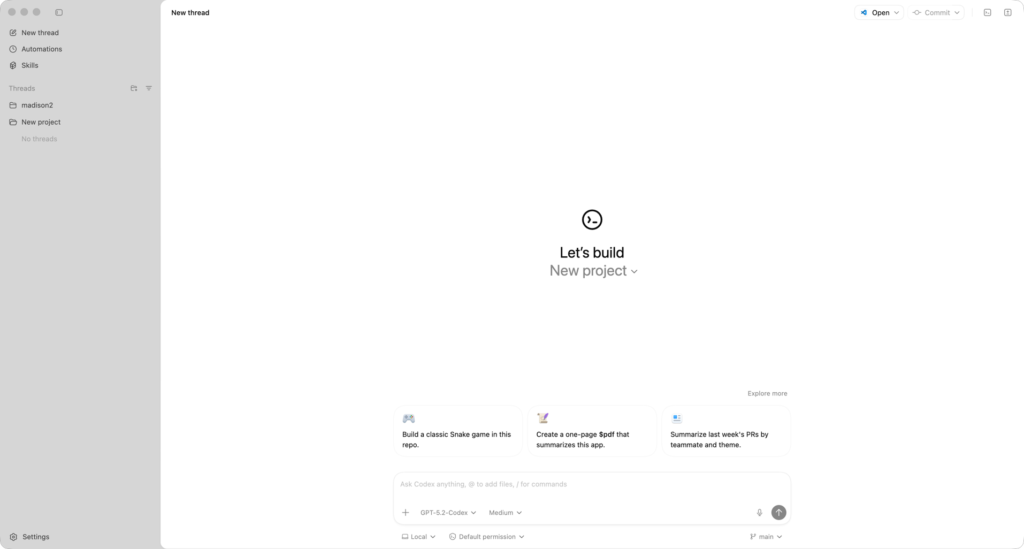
Open Codex and click the “Add New Project” icon. Navigate to your project folder, select it, and click open. It’ll appear in the Codex sidebar. That’s it. Codex now knows where your project lives and can see your files.
3. Write Your Prompt (This Is the Important Part)
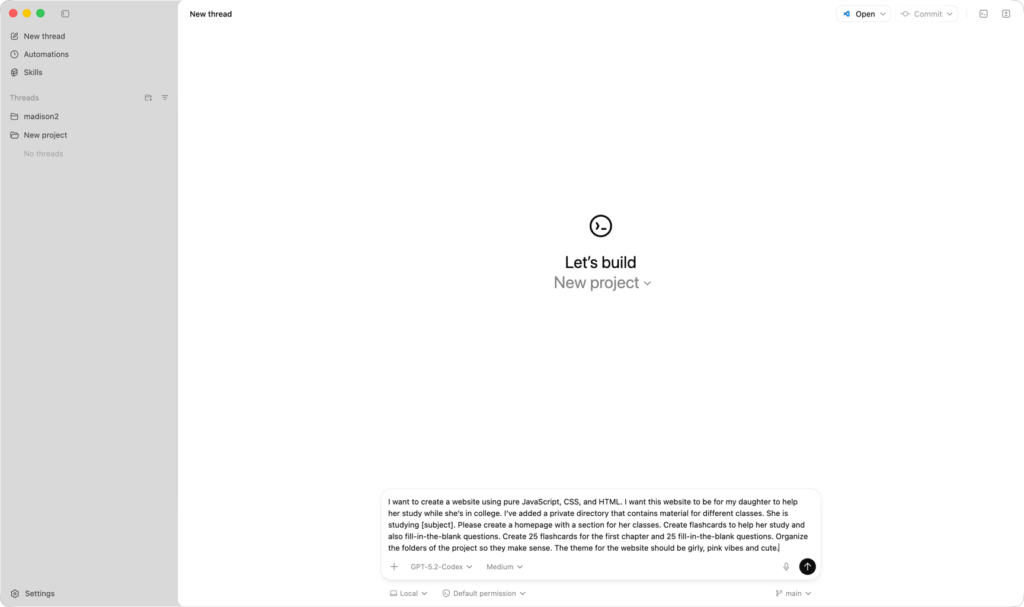
This is where you tell the AI what to build. Here’s what I wrote:
AI Prompt
I want to create a simple website using pure CSS, JavaScript, and HTML. I want this website to be for my daughter to help her study while she is in college. I have added a /private/ directory that contains material for different classes she is studying. Please create a homepage, with a section on it for her classes. The first class is BIOL 3200.
In that section will be a link to flash cards that you will create to help her study. Please make flash cards for the first chapter of the lesson material (25 cards). Make sure to include scoring too so she can keep track of what she got right and wrong.
I also want you to create fill in the blank questions where it will list a question and she should type the answer in. If she spells it correctly (not case sensitive) then it will be correct. Make it for the first chapter of the lesson material (25 questions). Also include score keeping, and make questions for each chapter, segmented by chapter.
Also, organize the folders in the project so they make sense. The theme for the website should be girly, so pink vibes, and cute.
Your prompt will be different, but the structure is the same. Let me break down the pieces that matter no matter what you’re building:
“Using pure JavaScript, CSS, and HTML.” Start your prompt with this exact sentence. These are three coding languages that run in every browser without special server software. There are tons of other programming languages out there (PHP, Golang, Rust, etc.) but they require complicated server setups. Stick to these three and everything stays simple. CSS makes the site look good, JavaScript makes it interactive, HTML organizes everything. You don’t need to know anything about them beyond telling the AI to use them.
Note: If you want to build something more complex, with a database, login restrictions, multiple users, etc, then you’re well beyond the scope of this training and would need additional programming languages / components to accomplish the job. You could still vibe code it, but just be aware that there are more “gotchas” involved.
Describe what the tool is for. I said “for my daughter to help her study.” You might say “for my sales team to compare product features” or “a portfolio site to showcase my work” or “a tool for my clients to calculate project estimates.” Be clear about who it’s for and what it does.
Reference your source material. I told it about the private directory and what’s in it. The AI will read those files and use them. This is what makes the output actually useful instead of generic. It builds from your content.
Be specific about features. I asked for flashcards and fill-in-the-blank questions with specific quantities. You’d specify whatever features make sense for your situation: “a filterable comparison table,” “a contact form and project gallery,” “an interactive FAQ,” whatever you need. Give the AI constraints or it’ll freelance.
Set the vibe. I said “girly, pink vibes and cute.” You might say “professional and clean” or “modern and minimal” or “bold and colorful.” The AI takes design direction surprisingly well.
Paste your prompt into the Codex chat window and let it run. Mine took about 24 minutes. It might ask you a question or two along the way. Just answer them and let it cook.
4. Check What It Built

When it finishes, go look in your project folder. You’ll see an organized file structure with an index.html file. Double-click that file and it opens in your browser, right on your local computer.
Now, if you don’t like something (the layout feels off, you want a feature added, something’s not quite right) just go back to Codex and tell it what to change in plain English. You can even take a screenshot of the thing you don’t like, paste it into the chat, and say “fix this.” Then simply reload the index.html file in your browser to see the changes.
At this point, you already have a working tool. If it’s only for you and you’re only going to use it on your own computer, you’re done. Just open that HTML file whenever you need it.
But if you want other people to access it (a student, a client, your team, anyone) you need to put it on the internet. That’s the next step, and it’s almost as easy as what you just did.
5. Put It On the Internet (Free)
We’re going to use Cloudflare Pages to host this. It’s free and takes about two minutes.
First, make a zip file. Find where your index.html file lives in your project folder. Select all the files at that same level, but NOT the private folder (that’s your source material, not part of the website). Right-click and compress them into a zip.
Quick note on this: your folder structure might look a little different from mine. The key thing is that your index.html needs to be at the top level of whatever you’re zipping. If it’s inside a subfolder like “public,” open that folder and select the files inside it. If your index.html is right there in the main project folder, select everything except the private folder.
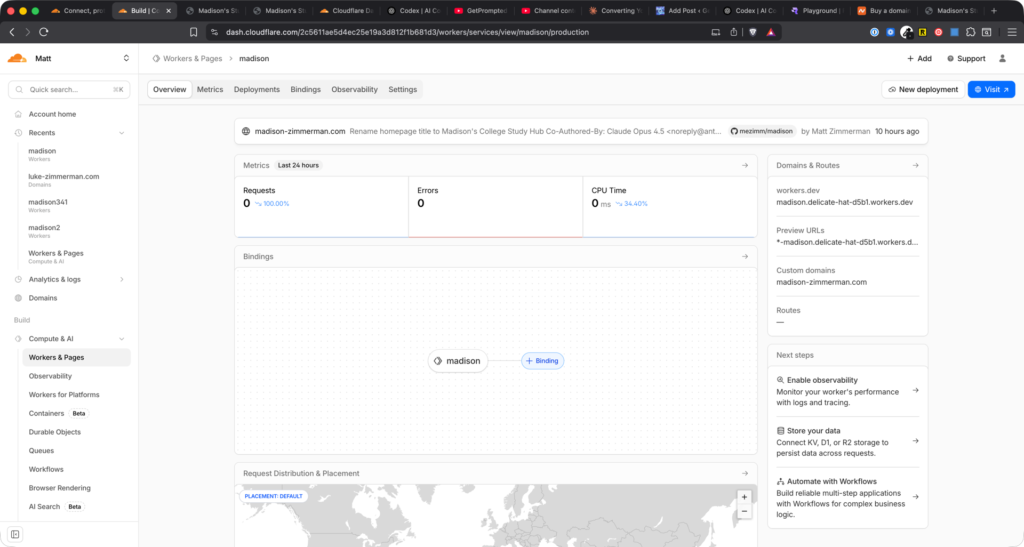
Then upload to Cloudflare:
- Log into Cloudflare
- Click Compute and AI in the sidebar, then Workers and Pages
- Click Create Application
- Choose to upload static files
- Drag your zip file into the upload area
- Customize the first part of your URL to something memorable
- Click Deploy
Click the globe icon to see your live URL. That’s your website. Anyone in the world can access it right now.
Send that link to your daughter, your students, your client, your boss, whoever it’s for. Watch their reaction. That’s the fun part.
6. Making Changes
Inevitably, you’ll want to tweak something. Maybe you want to add more content, change the layout, update the text, add a whole new section. The process is simple:
Go back to Codex, make sure you’re in the right project thread, and tell it what you want. I changed “Study Garden” to “Madison’s Study Garden.” Took about five seconds.
Then repeat the zip-and-upload process: select your updated files, compress, go to your Cloudflare deployment, click New Deployment, drag in the new zip, deploy. Your live site is updated.
If you want to get fancier, you can connect Codex to GitHub (a free code storage service) and then link GitHub to Cloudflare so that every time you make a change in Codex, it automatically updates your live website. No more manual zip-and-upload. That’s beyond the scope of this walkthrough, but know that it exists for when you’re ready.
7. Custom Domain (Optional)
If the Cloudflare URL looks too janky, grab a domain from Namecheap. Stick with .com. Other extensions like .ai cost way more ($79/year vs. ~$18/year).
Side note: if you have kids, I’d highly recommend grabbing a domain with their name while you can. I got one for my daughter and one for my son. It’s like $18/year and someday they’ll need it for a portfolio, a personal site, a professional landing page. Something.
Here’s the domain setup in a nutshell:
- Register your domain on Namecheap
- In Namecheap, go to Manage and change nameservers to Custom DNS
- In Cloudflare, add your domain (click the cloud icon, then Onboard a Domain, then free plan)
- Cloudflare gives you two nameserver addresses. Paste them into Namecheap.
- Back in Cloudflare, go to your deployment, then Domains and Routes, then connect your domain
DNS technically takes up to 48 hours but usually kicks in within a couple minutes. Refresh and your site is now at a clean URL.
What Could YOU Build With This?
I used this to make a study tool for my daughter. But the exact same process (source files in a private folder, a plain English prompt, deploy to Cloudflare) works for almost any simple web tool you can think of.
If you’re in sales. Upload your product catalog and have the AI build an interactive comparison tool. Clients pick their needs, the tool surfaces the right product. Send them the link instead of a 40-page PDF no one reads.
If you’re in marketing. Drop in brand assets and campaign briefs, have the AI build a landing page or microsite. Test concepts without waiting three weeks for a developer.
If you manage a team. Upload your SOPs and onboarding docs, get an interactive training hub. New hires get a single URL on day one instead of a Dropbox link to 47 scattered PDFs.
If you’re a teacher. Upload lesson materials, get a full study site with quizzes and flashcards. Share one URL with your entire class.
If you’re job hunting. Feed it your resume, a headshot, and some project descriptions. Get a polished portfolio site on a custom domain with your name.
If you run a small business. Upload your service descriptions and pricing, get a clean site you can share with potential customers. No WordPress. No web designer. No monthly fees.
These are just starting points. Once you see how fast you can go from “I have some files” to “I have a working website,” you’ll start seeing opportunities everywhere. That’s the real unlock.
The Bigger Point
Here’s what I want you to take away from this.
You don’t have to build some giant application to do something impressive with AI. You don’t need to automate your entire workflow or launch a SaaS product or learn to code. Sometimes the most powerful thing you can do is build something small that solves a real problem for a real person, including yourself.
A study site that makes your kid call you back. A tool that makes a client say “wow, this is exactly what I needed.” A portfolio that gets you the interview. A resource that makes your boss ask how you pulled it off so fast.
That’s being awesome with AI. And you just learned how to do it.